 Click to call

Painting Window Trim: How-To Guide

Ready to give your home a fresh look? Painting your window trim is a fairly simple project that can make a big impact. It’s also a cost-effective way to boost curb appeal and allows you to personalize your space.
You can get most painting projects done in as little as a day. But if you’re unsure how to paint window trim on your own, don’t hesitate to contact the professionals at Mr. Handyman® for a job done right.
1. Determine Your Window Trim Surface
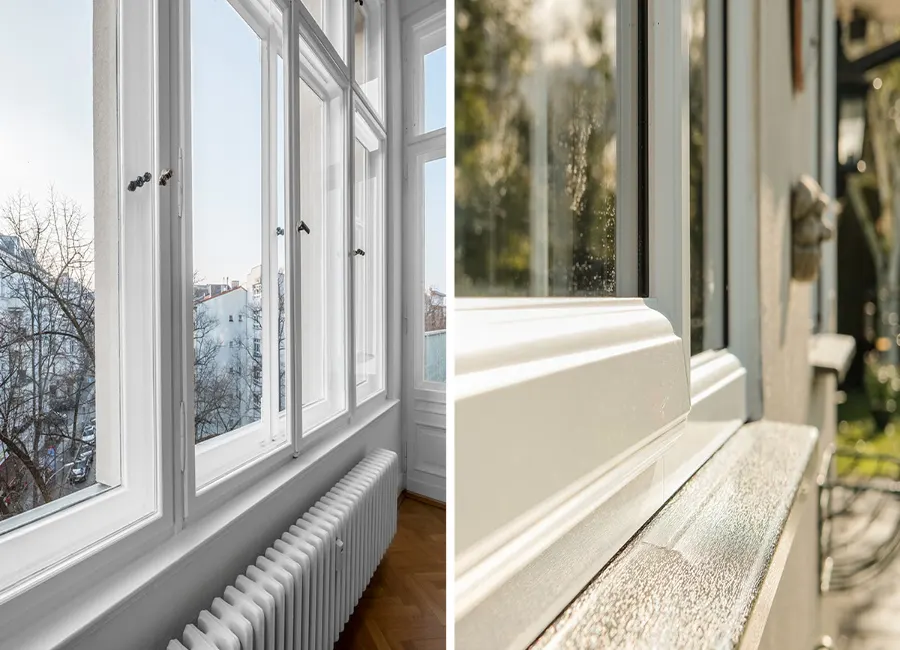
Window trim comes in a variety of styles and can work just as well outdoors as indoors. Painting window trim on your home’s exterior also requires a different approach than the interior.
Interior window trim comes in a wide range of varieties, such as hardwood, reclaimed wood, fiberboard, and polyurethane to allow you to match your decor.
Exterior window trim is more functional and often contains additional components such as drip caps and sills. These direct water away from the window and protect the structure of your home. Popular varieties of exterior window trim include vinyl, fiber cement, cellular PVC, and hardwood.
2. Choose the Right Window Trim Paint

While many paint types are advertised as working on multiple surfaces, selecting paint designed specifically for your window trim is best. The specifically formulated window trim paint is designed to withstand wear and tear, requiring less maintenance.
From wood to metal, here are some of the most common types of window trim materials and the paint that will best suit the situation:
- Wood: Selecting an oil-based or acrylic latex paint is best when working with wooden or exterior trims. Oil paint can penetrate the wood, creating a strong bond that is great for durability. Modern latex paint works well for interior trim, providing a gloss surface and low volatile organic compounds (VOCs).
- MDF (medium-density fiberboard): When working with an MDF trim, consider using acrylic latex paint; it dries quickly and provides a smooth appearance. Unlike wooden trim, MDF's stability minimizes expansion and contraction, which can cause paint on wood to crack. You can also use oil-based paints designed for MDF surfaces.
- PVC (polyvinyl chloride): This modern type of plastic trim needs a paint that sticks well, as the surface can be slick. Select an acrylic latex paint for the best level of adhesion.
- Polystyrene: This rigid foam, used mainly on exterior trim moldings, needs paint that won't dissolve or damage it. For polystyrene, select water-based paint over solvent-based paints. A water-based acrylic latex paint is a perfect option to create a smooth, uniform finish.
- Metal: Sometimes used for exterior window trim, you can paint metal with acrylic latex or oil-based paints; we recommend choosing an option with added rust protection. If you know your metal window trim will experience harsh weather conditions such as extreme heat and cold, epoxy paint is another option, but it is considerably more expensive.
3. Gather Your Supplies
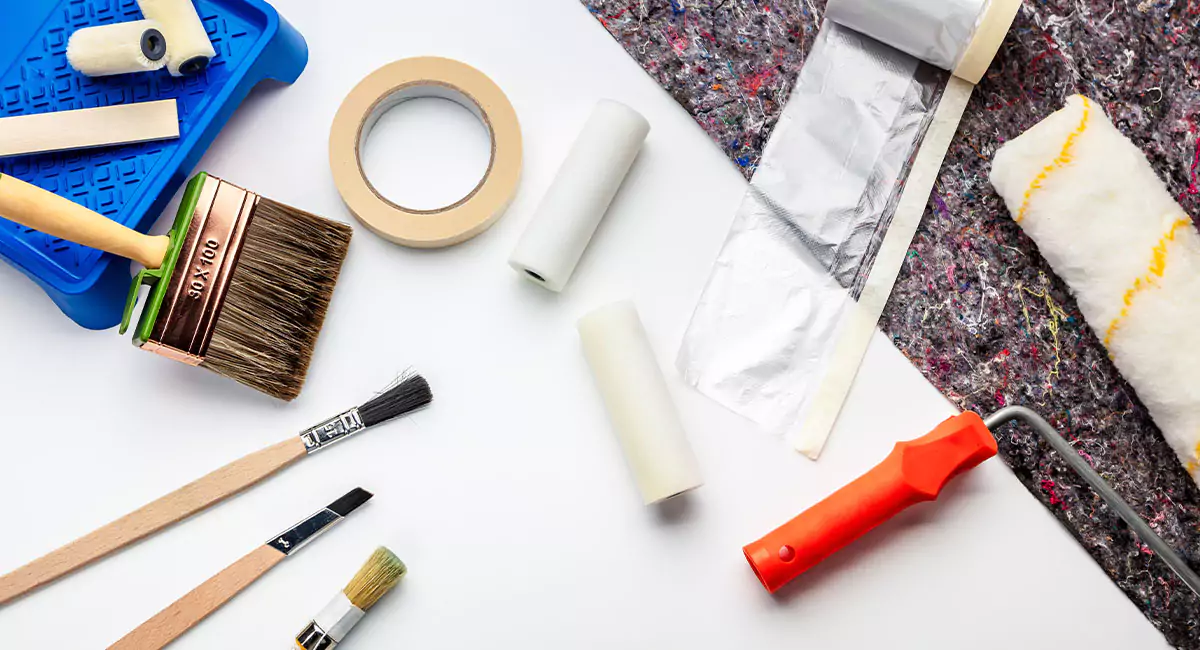
As with any painting job, you won’t get very far without the right tools. For cleaning and prepping the area, you’ll need:
- Microfiber cloths
- Vacuum
- Gloves
- Sponges
- Scrub brushes
- Bleach
- Detergent
- Dust mask
You'll need a brush or roller suitable for the job to paint your window trim. You can use a small dense foam roller or a brush for larger flat surfaces. However, you'll want to stick to a high-quality angled brush for more detailed areas.
Gloves will protect you from harsh cleaning chemicals like bleach and detergent. You can also keep them on the entire time you work to keep your hands paint-free.
Additional materials you’ll need for painting include:
- Putty knives
- Painter’s tape
- Drop cloths
- Sandpaper
- Wood filler
- Primer
- Paint
- Paint brushes
- Paint trays
- Caulk
- Safety goggles
- Ladder
4. Clean and Prepare Your Window
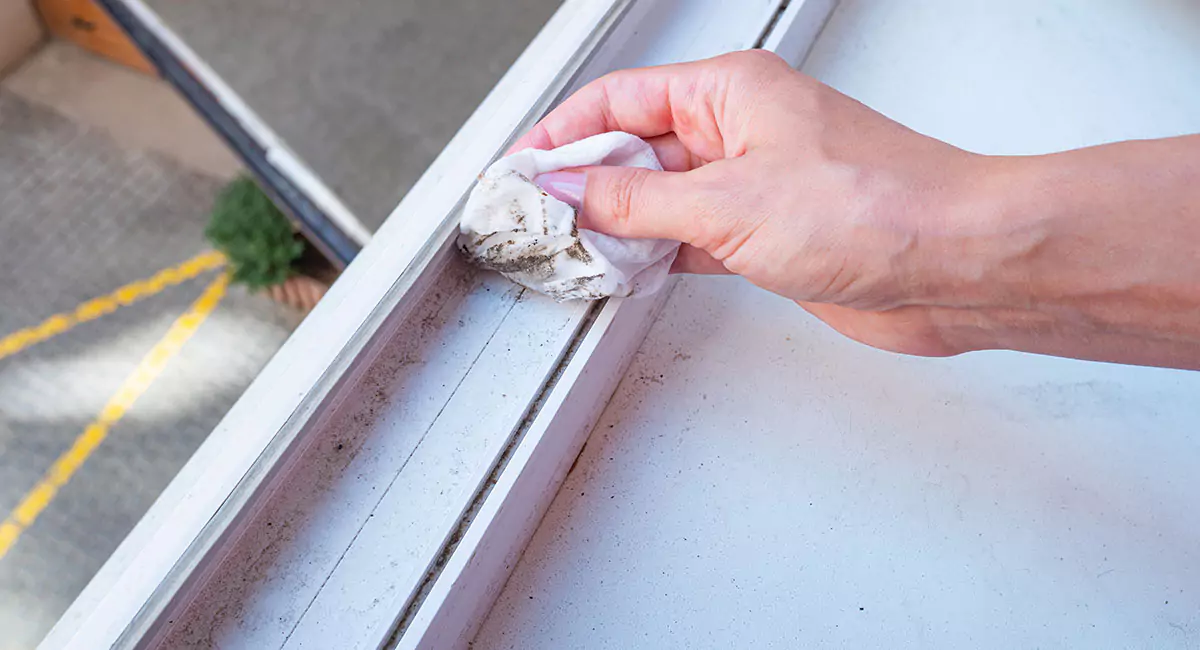
Before you start, make sure you clean the area and prepare the surface for painting. Use your microfiber cloth to clean off any dirt and grime while also keeping an eye out for mold and wood rot.
You may also want to clean the area around the trim to keep unwanted debris from falling onto your fresh paint.
5. Sand and Prepare Your Trim
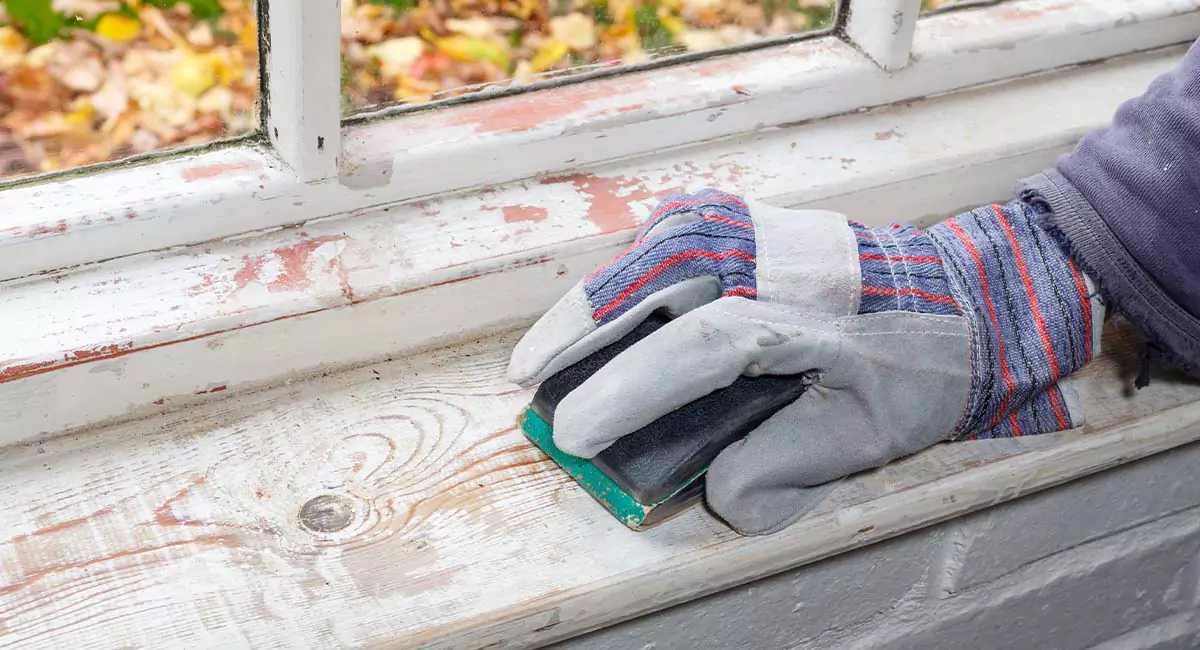
Before you get started, make sure you have acceptable painting conditions to work in. For example, if it rained recently, ensure your trim is thoroughly dry.
Now you get to use your wood filler and sandpaper. Apply the wood filler to any holes or cracks using your putty knife.
Wait until the wood filler completely dries (typically 15-30 minutes) before sanding the trim with sandpaper. This is also a good time to consider whether to caulk any air leaks or winter-proof your windows. Before you move on to priming your window, wipe down all surfaces again to ensure they are dust-free and dry.
6. Create Borders With Painter’s Tape
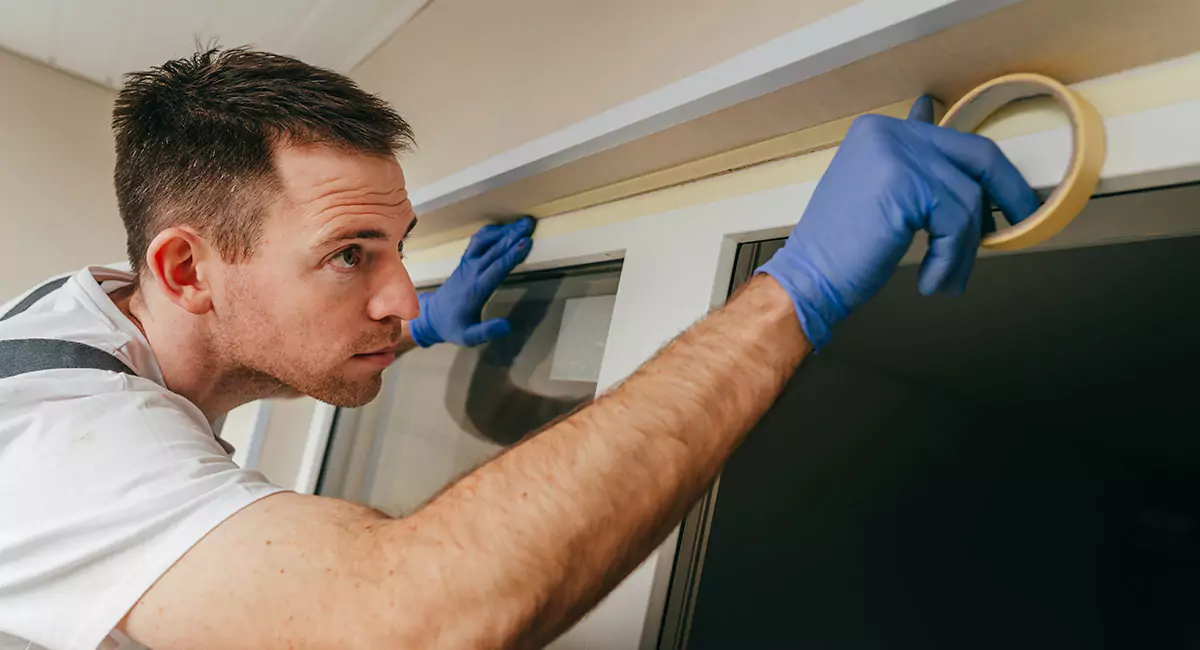
Avoid getting paint where it shouldn’t be with painter’s tape. In addition to preventing you from overpainting, it also helps keep your lines neat and straight. Types of painter’s tape include:
- Blue painter’s tape: This is a standard choice for most painting projects. It works best for walls, trim, or ceilings. Blue painter's tape offers a medium level of adhesion and is designed for clean removal.
- Green painter’s tape: Otherwise known as multi-surface painter’s tape, it works well on delicate or textured surfaces. Wallpaper and freshly painted walls benefit from the added protection this tape provides.
- Yellow painter’s tape: Like white tape, yellow painter’s tape often has broader uses. It can be used to mark off areas or create temporary borders. It is slightly stronger than blue painter’s tape and should only be used on surfaces like metal, glass, or plastic.
- White masking tape: While typically used for labeling, white masking tape can be used for creating borders when painted. However, be cautious as masking tape has a strong adhesion level and may leave residue.
|
Different Types of Painting and Masking Tape |
||||
|
White |
Yellow |
Blue |
Green |
|
|
Adhesion Level |
Strong |
Medium |
Medium |
Medium |
|
Temperature Resistance |
Low |
High |
Medium |
Medium |
|
Residue Risk |
High |
Low |
Low |
Low |
|
General Cost |
Low |
High |
Medium |
Medium |
Once you choose the appropriate tape for your project, you’re ready to start applying it. Create a border between your window trim and the wall by using your tape and firmly pressing it, working in small sections. Be sure to overlap your tape at the corners, as this will prevent any paint from trickling under.
To avoid getting paint onto the glass, add another border between your glass pane and window frame once you have created a border around your trim and wall. You can use painters or masking tape for this process, applying it similarly to before, or you can use paper to first cover the glass and then secure it with tape.
7. Prime Your Window for Paint
Primer acts as a base coat that helps paint stick to the surface of your trim while protecting it. It also hides stains and seals up porous surfaces. If you are repainting trim or molding that has already been painted with latex-based paint, then a primer is typically unnecessary.
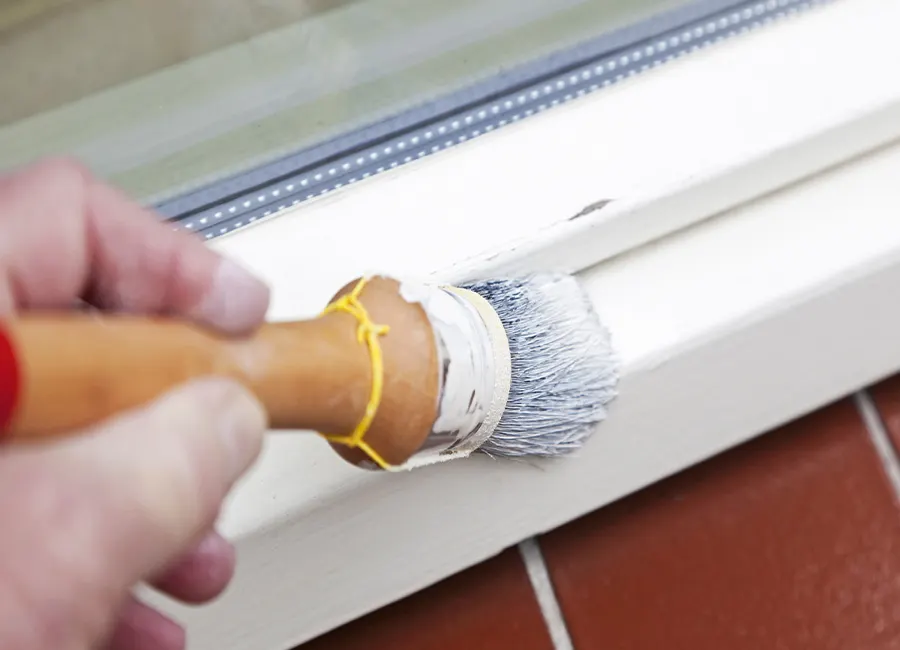
Before applying primer, make sure your work area is well-ventilated. Use the drop cloth to prevent any splatter. A damp paint brush will help the primer set evenly to the trim as you work it in.
For both interior and exterior trim, start with the corners and edges before brushing the primer across the rest of the surface. If you need to use more than one coat of primer because you can see through the first coat to the trim’s original surface, allow the first coat to dry completely before applying the next one. In some situations, you may be able to get away with a single coat, but two coats will help to create a more uniform base for your paint, producing a smoother finish in the end.
Note that temperature will play a factor in drying time with cold or humid weather, slowing down the drying process, especially on exterior trim. Most primers will take a few hours to dry; we recommend checking your primer manufacturer’s instructions for an exact time frame.
8. Paint Your Window Trim
The steps will vary slightly depending on whether the window trim you are painting is located on the interior or outside of your home. Exterior trim is more exposed to harsh weather conditions and temperature fluctuations than interior trim, so there are additional considerations. Select the correct selection below to paint your window trim.
Interior window trim painting
When painting interior trim indoors, start with the least visible faces, like the edges or bottom. Other trim pieces often cover these areas, minimizing the impact of any minor mistakes during your initial practice.
For both brush and roller application, less paint is key to avoid streaks. Follow these tips with your applicator of choice to ensure streak-free results:
- Brush: Dip only one-third of the bristles into the paint and remove excess. Apply with gentle, even pressure.
- Roller: Submerge the roller less than halfway into the paint. Roll it back and forth on the roller tray to remove excess and ensure an even coating.
Apply thin, even coats. Allow each coat to dry completely before applying the next. Refer to the paint and primer instructions for drying times. Once both coats are dry, carefully remove the painter's tape.
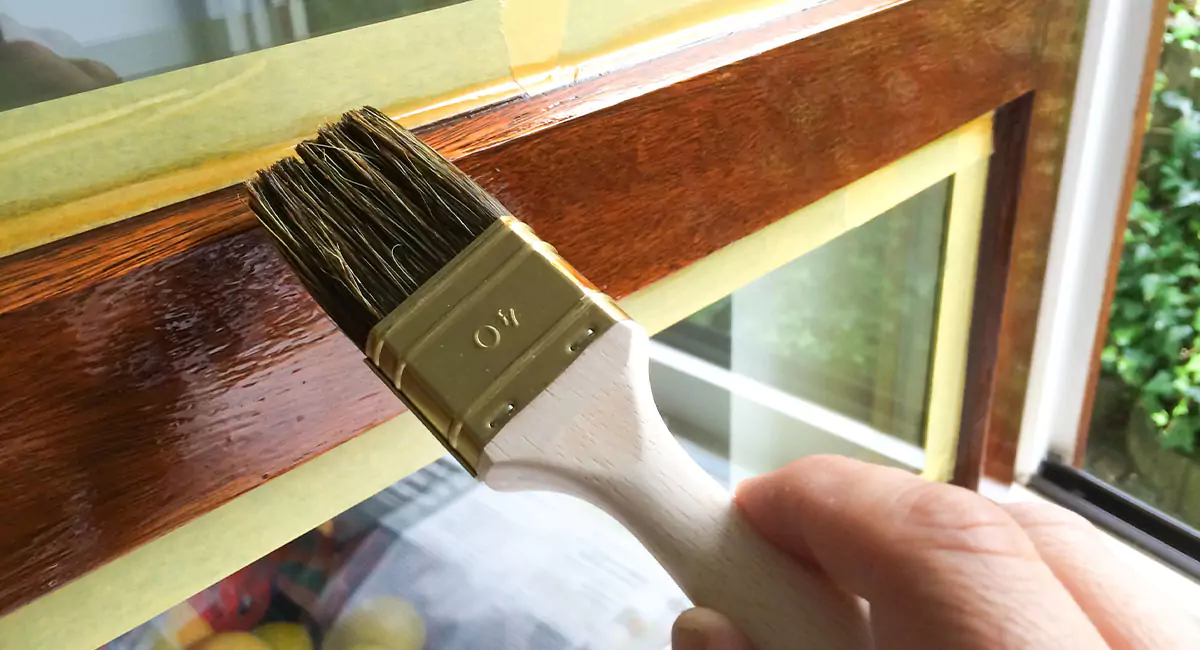
Exterior window trim painting
For the exterior, we recommend starting with the side that faces away from the most prominent angle so you can blend paint as you work with a high-quality angled brush.
As with interior window trim painting, ensure that not too much paint is used. Dip your brush one-third of the way into your paint and remove any excess. As you paint, use gentle strokes with even pressure to reduce the potential for streaking. Once the first coat is dry, you can apply the second coat of paint.
Sealant application
After you finish painting, let the trim sit for at least 30 days (ideally 60-90 days if you can wait) to let it fully dry. Then, seal and wax the exterior trim to help protect it and extend its longevity.
For interior trim, you can use a polymer or polyurethane sealant that works on multiple surface types for essential protection. For exterior trim, consider using a silicone sealant that better seals gaps and protects against weathering.
Always double-check the packaging to ensure the specific sealant you purchase suits your window trim’s surface. Some manufacturers may produce variations of sealant designed for different surfaces.
Alternatively, waxes can replace sealants, offering a thin layer of protection, but they must be reapplied as they don’t last as long. A natural wax like carnauba lasts around 3-8 weeks, while a modern synthetic wax can last up to 6 months.
How To Maintain Window Trim Paint
Now that you’re done painting your window trim, it’s important to keep it in top shape. Ideally, it should be several years before you notice any visible wear and tear. Still, it’s a good idea to stay on top of maintenance.
The first step is to clean your window trim regularly. Avoid pressure washing and using harsh chemicals that might scratch or damage the paint. Check the ingredients and instructions of your cleaning products to see if they’re safe for painted surfaces.
If you notice any carpentry or window damage, have it repaired as soon as possible. Always be on the lookout for mold or signs of rot so you can address these issues before they become bigger problems.
Here are the best ways to clean different types of window trim materials:
- Wood: Wipe down the trim with a damp cloth dipped in warm water and mild dish soap every few weeks. Once finished, dry the trim thoroughly. Every few months, use a wood cleaner or polish to remove dirt and grime.
- Painted wood: Like regular wood, use a damp cloth with warm water and mild dish soap to wipe down the trim. Once finished, dry the trim thoroughly. Every 6-12 months, use a mild all-purpose cleaner to remove excess dirt.
- MDF: Every few weeks, use a microfiber cloth with a mild all-purpose cleaner, drying once finished. Use water and vinegar every 6-12 months to help remove more stubborn stains and grime.
- PVC: Wipe down the trim with a damp cloth and all-purpose cleaner every few months. Once a year, use a non-abrasive PVC cleaner to help remove any tougher stains.
- Metal: Using a microfiber cloth with mild dish detergent, wipe down your window trim at least twice a year or when it begins to look dirty. For more stubborn stains, a soft-bristled brush can help with scrubbing.
You will also need to reapply your sealants to help maintain your freshly rejuvenated window trim. Most sealants need replacement every 1-2 years, but some high-quality options may last up to five years. Check the sealant’s instructions for more information on how often it may need reapplication.
Let Mr. Handyman Paint Your Window Trim
Keep things easy and convenient and leave window trim painting to the professionals. With Mr. Handyman, you don’t need to purchase expensive tools or worry about your brush technique. Whether it’s painting services or installing window trim, call or request service online to get your project started today.
This article is intended for general informational purposes only and may not be applicable to every situation. You are responsible for determining the proper course of action for your home and property. Mr. Handyman is not responsible for any damages that occur as a result of this blog content or your actions. For the most accurate guidance, contact your local Mr. Handyman location for a comprehensive, on-site assessment.
Painting Window Trim FAQs
Mr. Handyman has been helping homeowners repair, maintain, and enhance their spaces for over 25 years! Our expertise includes answering your questions about home repairs, maintenance, and improvements. Here are frequently asked questions we receive about painting window trim:
Should window trim be satin or semi-gloss?
Satin and semi-gloss finishes are excellent options when selecting a finish for your interior window trim. The final decision will depend on personal taste; however, it is helpful to know that semi-gloss surfaces are easier to clean and provide higher levels of moisture resistance. When selecting a finish for exterior trim, a semi-gloss finish is a good option due to its higher durability and better weather protection.
Do you have to sand window trim before painting?
Yes, you need to sand your window trim prior to painting. Sanding removes imperfections and prepares your trim for priming and painting. The fewer bumps, cracks, and imperfections, the easier it is to achieve a smooth finish and high-quality paint job look.
How do you paint window trim smoothly?
Start by making sure your surface is well-sanded, dust-free, and clean. Use long, smooth strokes instead of dabbing the surface to get better results. High-quality primer and paint will also help you achieve a smooth, even finish. When in doubt, contact a professional for help.
Should you use a roller or brush when painting window trim?
You can use either a brush or roller to paint your window trim, but in general, a paintbrush is considered the better option. A window trim's narrow surface makes a brush easier to manipulate and get into crevices and allows better control for a smooth finish. If you use a roller brush to paint window trim, we recommend using it on simple, flat surfaces for even coverage.
How do you paint window trim without brush marks?
To help achieve a surface without brush marks, we recommend using a high-quality brush and practicing your paint application technique. Use long, smooth strokes, and follow the grain's direction when painting on wood. Other strategies you can employ include:
- Wet-on-wet: Apply paint to wet areas, allowing for better color blending. You will need to work fast using this technique, as waiting too long will cause any previously wet areas to dry.
- Rolling and tipping: If two people are working on the project, one applies a thin coat of paint with a roller, and the other follows up with a brush to smooth the surface.